Open Main Menu
Make a Paper Snowflake

Make a Paper Snowflake

It’s snowing – inside! Learn how to fold and cut a scientifically correct snowflake, as you bring the winter indoors. This is a fun winter activity that all ages will enjoy.

Gingerbread Science Adventure

Educator Rating:
5
Parent Rating:
0

What I'll Learn

Snowflakes are beautiful forms of frozen water that fall from the sky when it’s really cold.  But because they are so fragile, they melt quickly around heat.  No matter where you live, you can learn a little about snowflake geometry and bring snowflakes inside when you fold and cut your own snowflake decoration.


Download this template now so you can check if off your supply list below:
Snowflake Template

What to Do

What I Need

What to Do: Step-by-Step Instructions

1

You can learn to fold and cut a scientifically correct snowflake two ways:

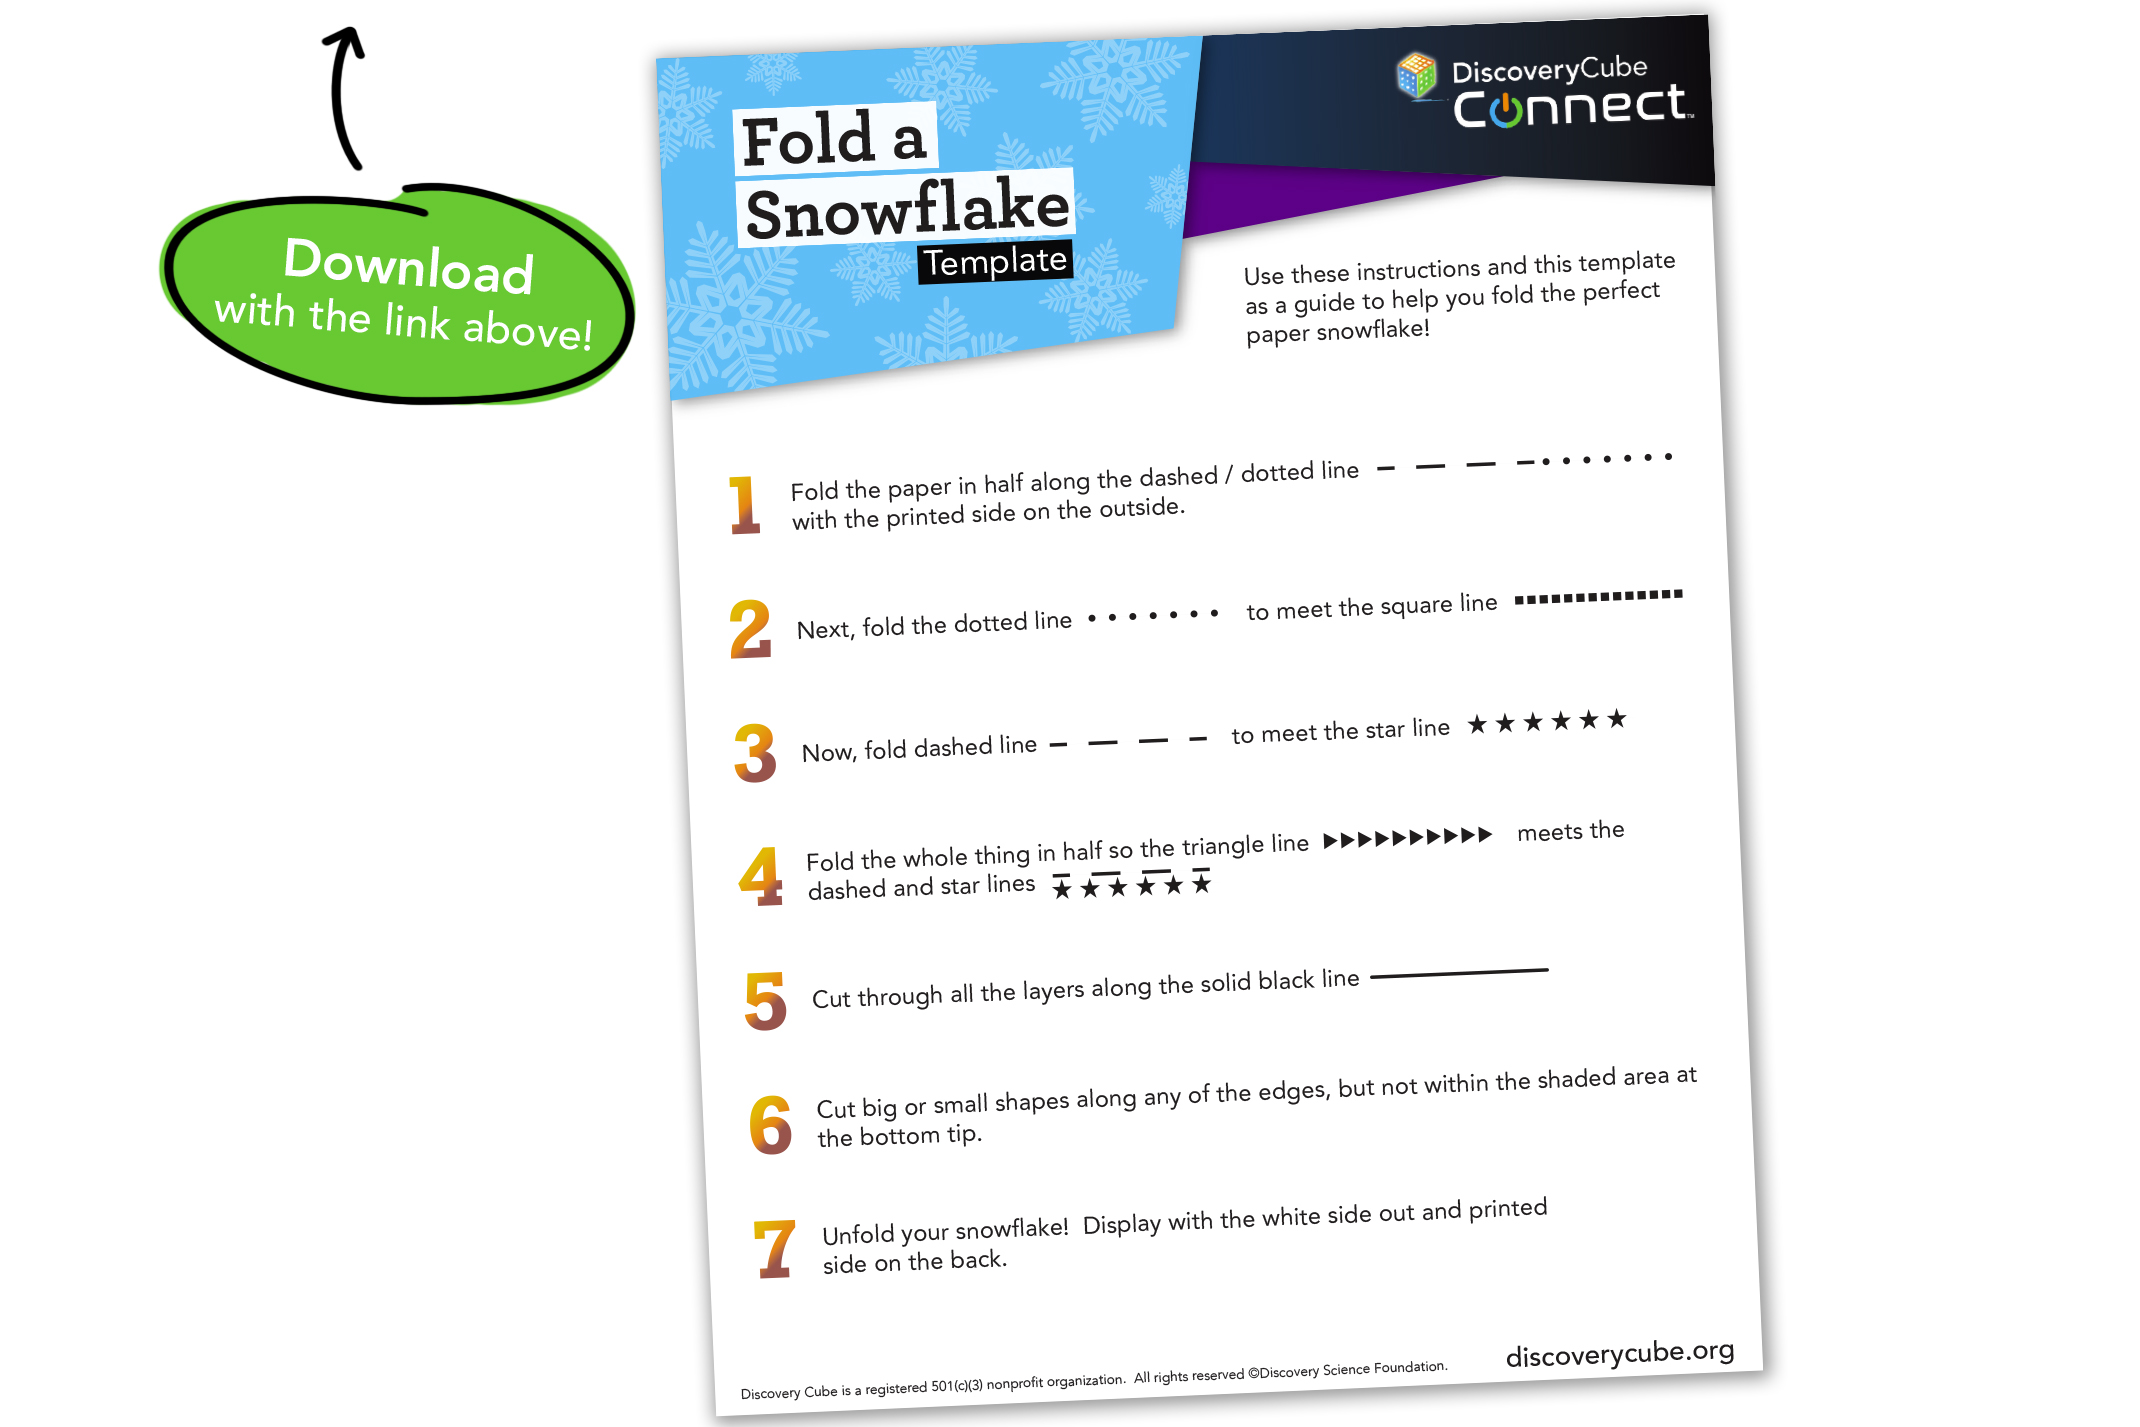
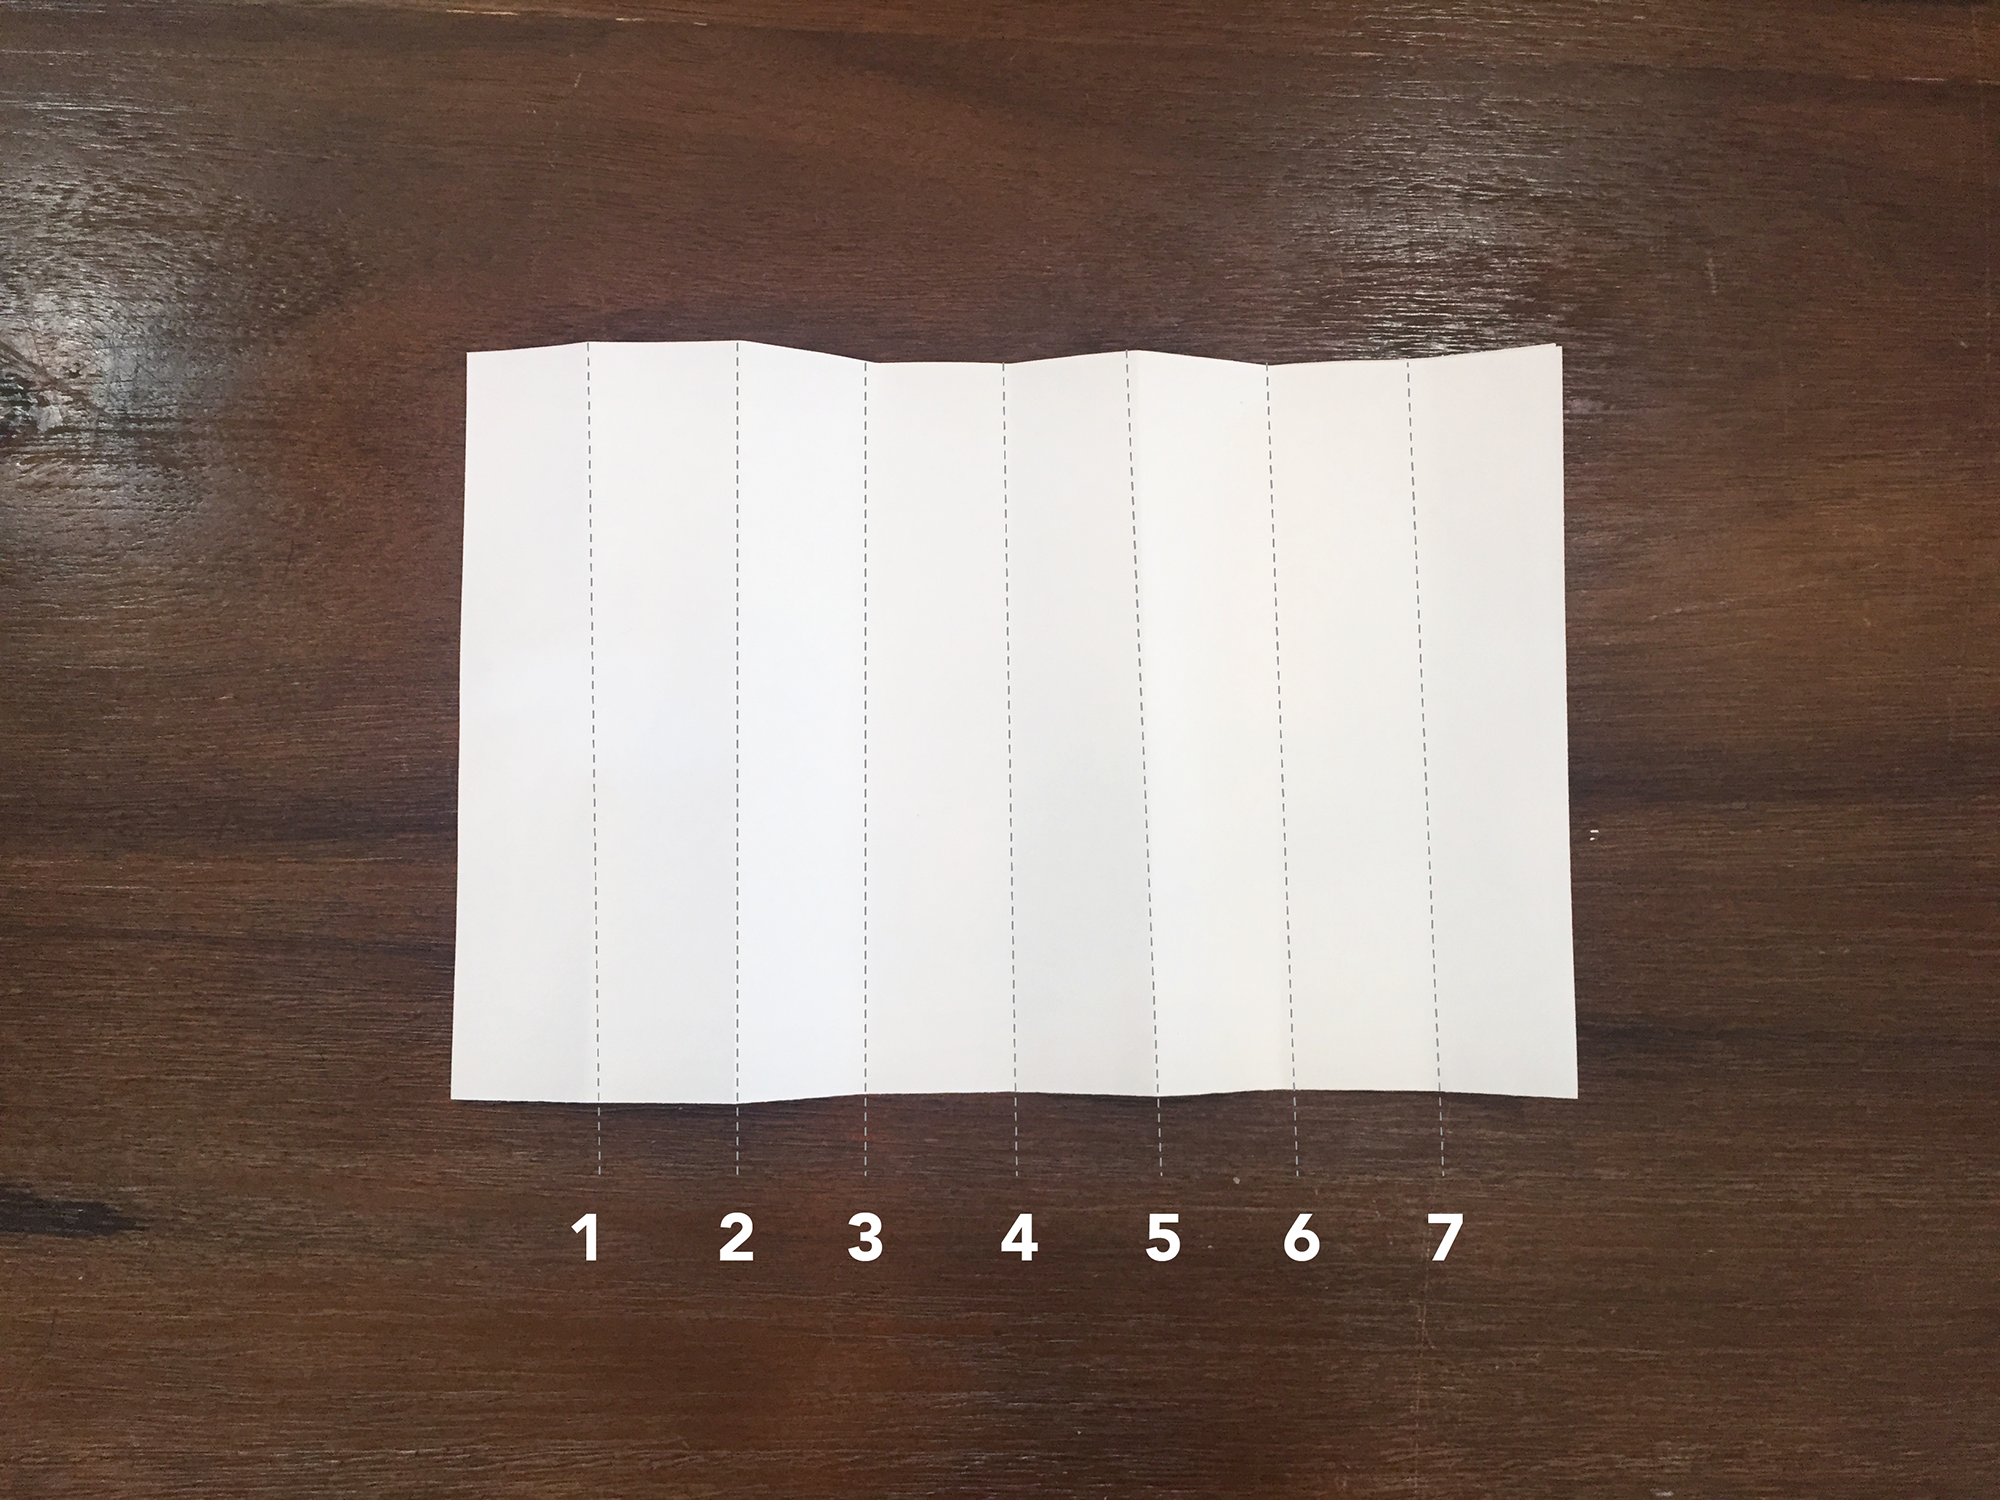
  1. Print the Snowflake Template provided as a guide, following the instructions on the template.
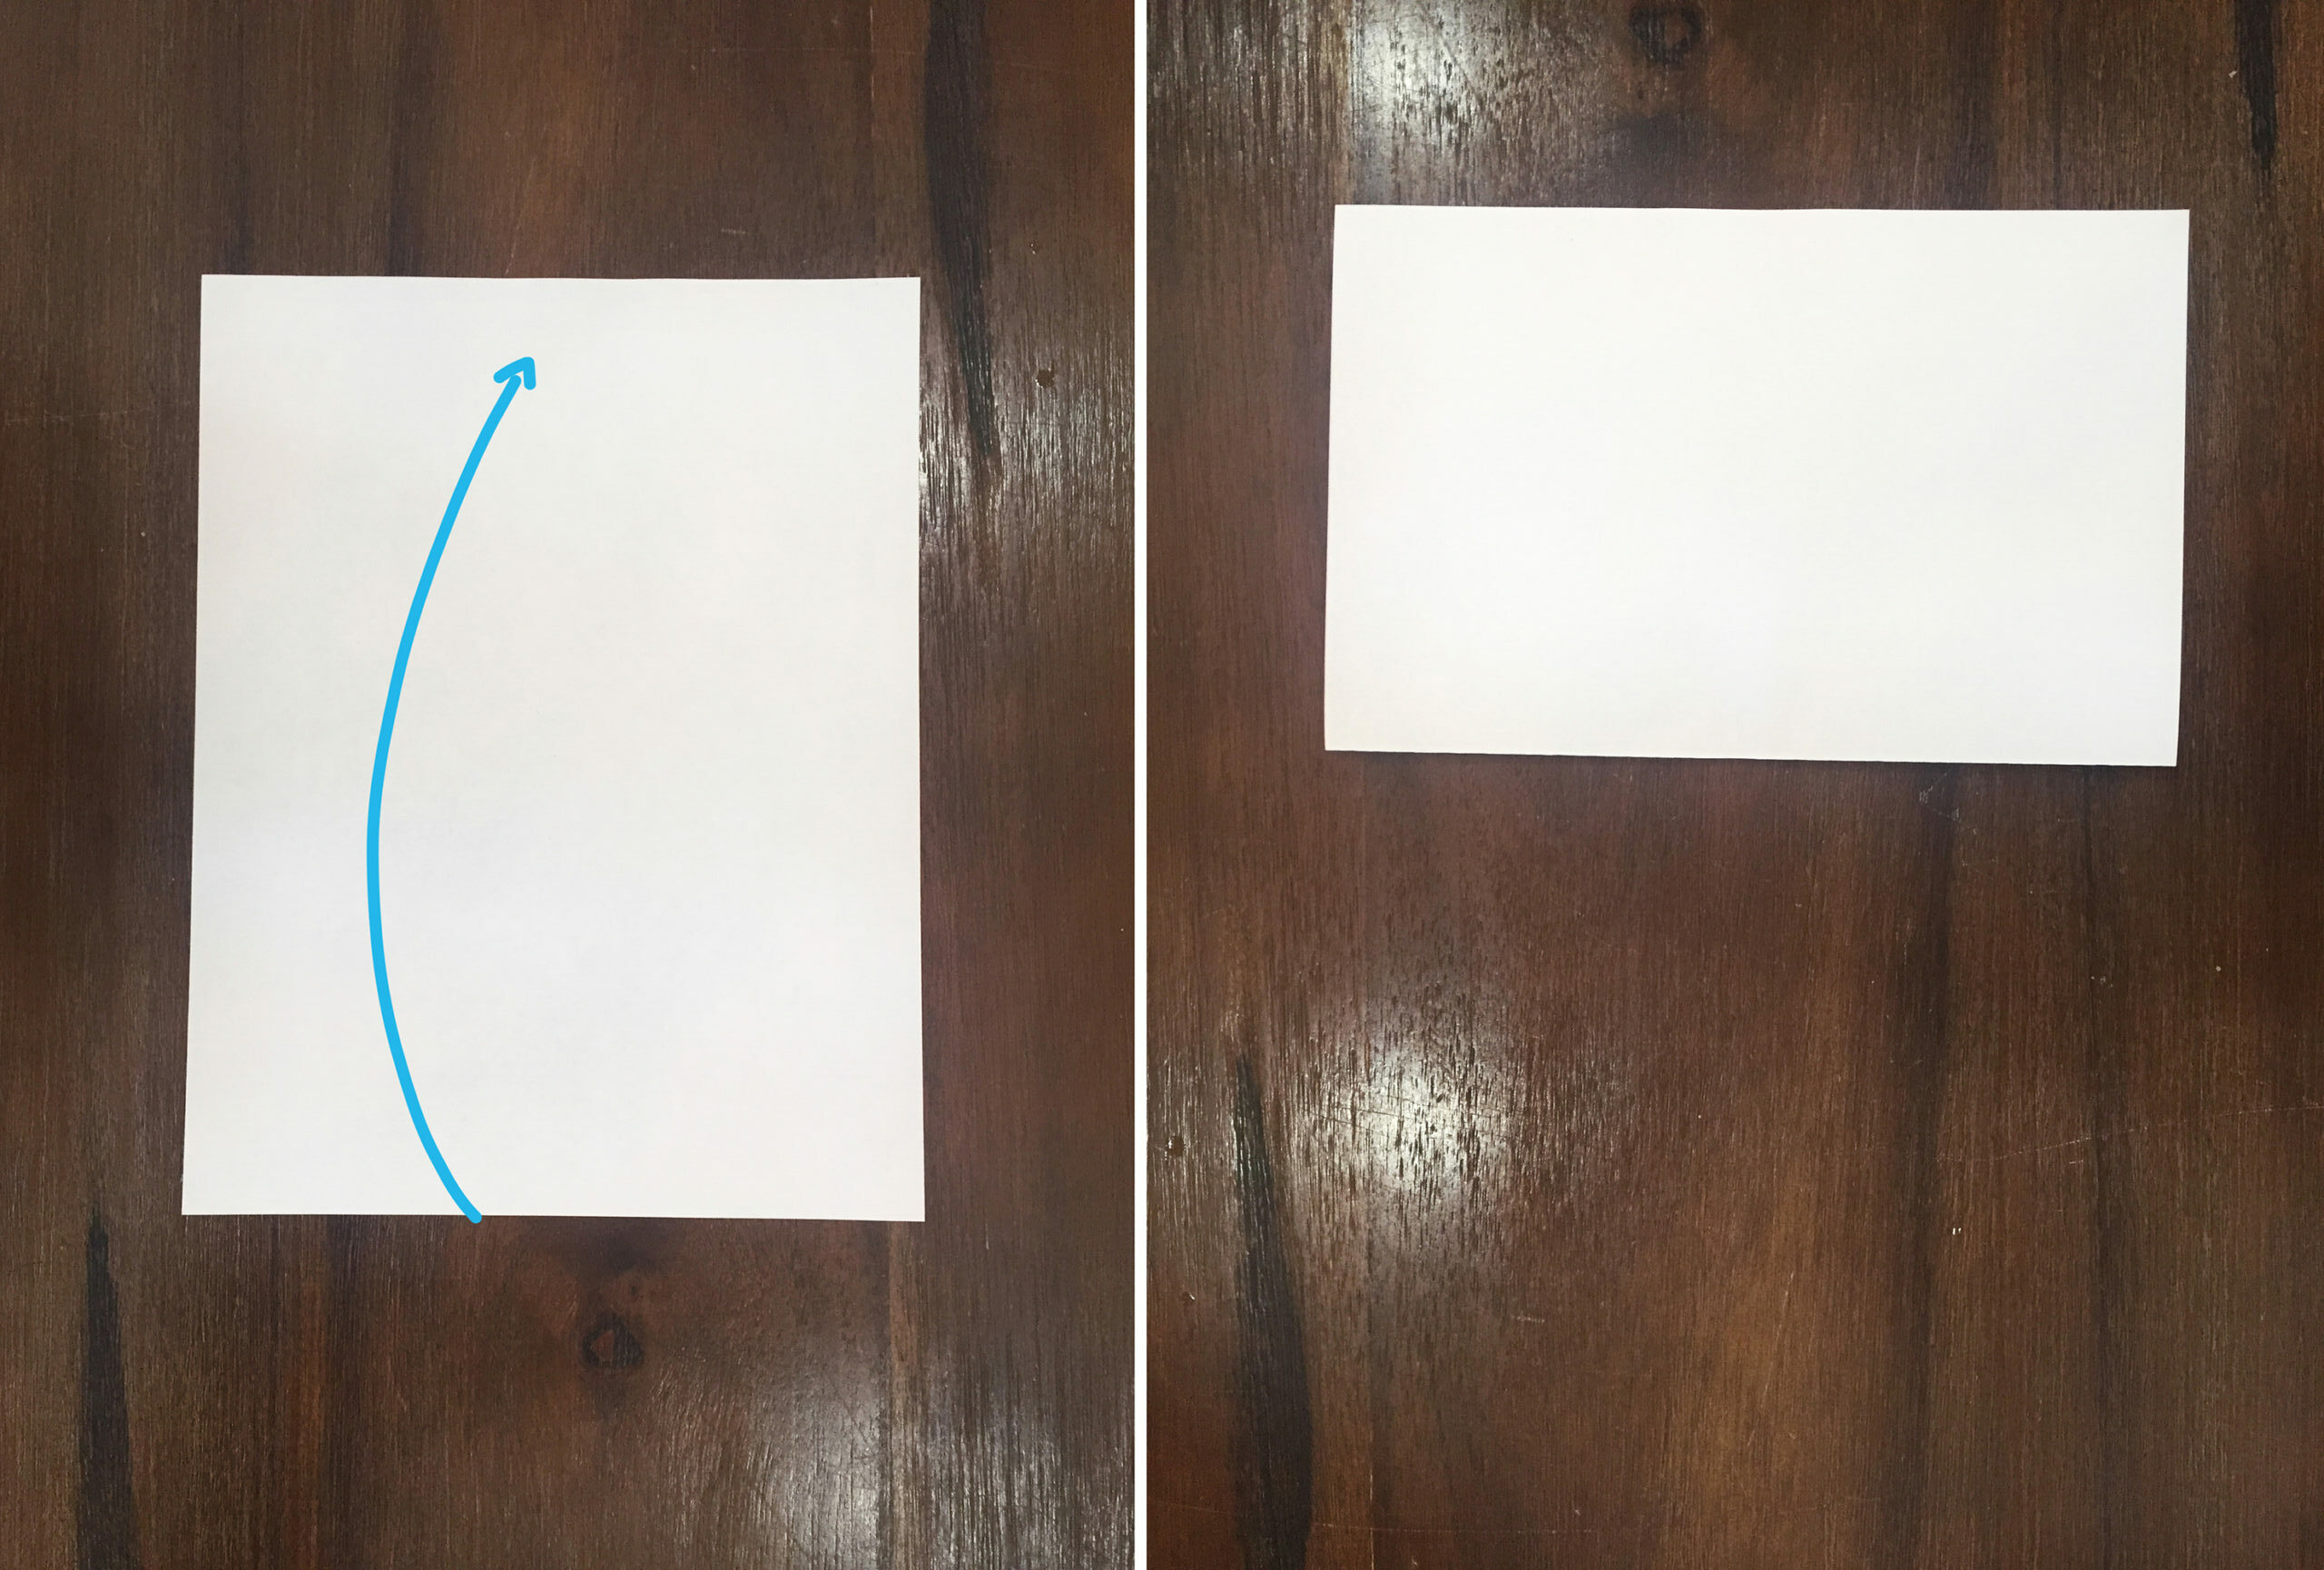
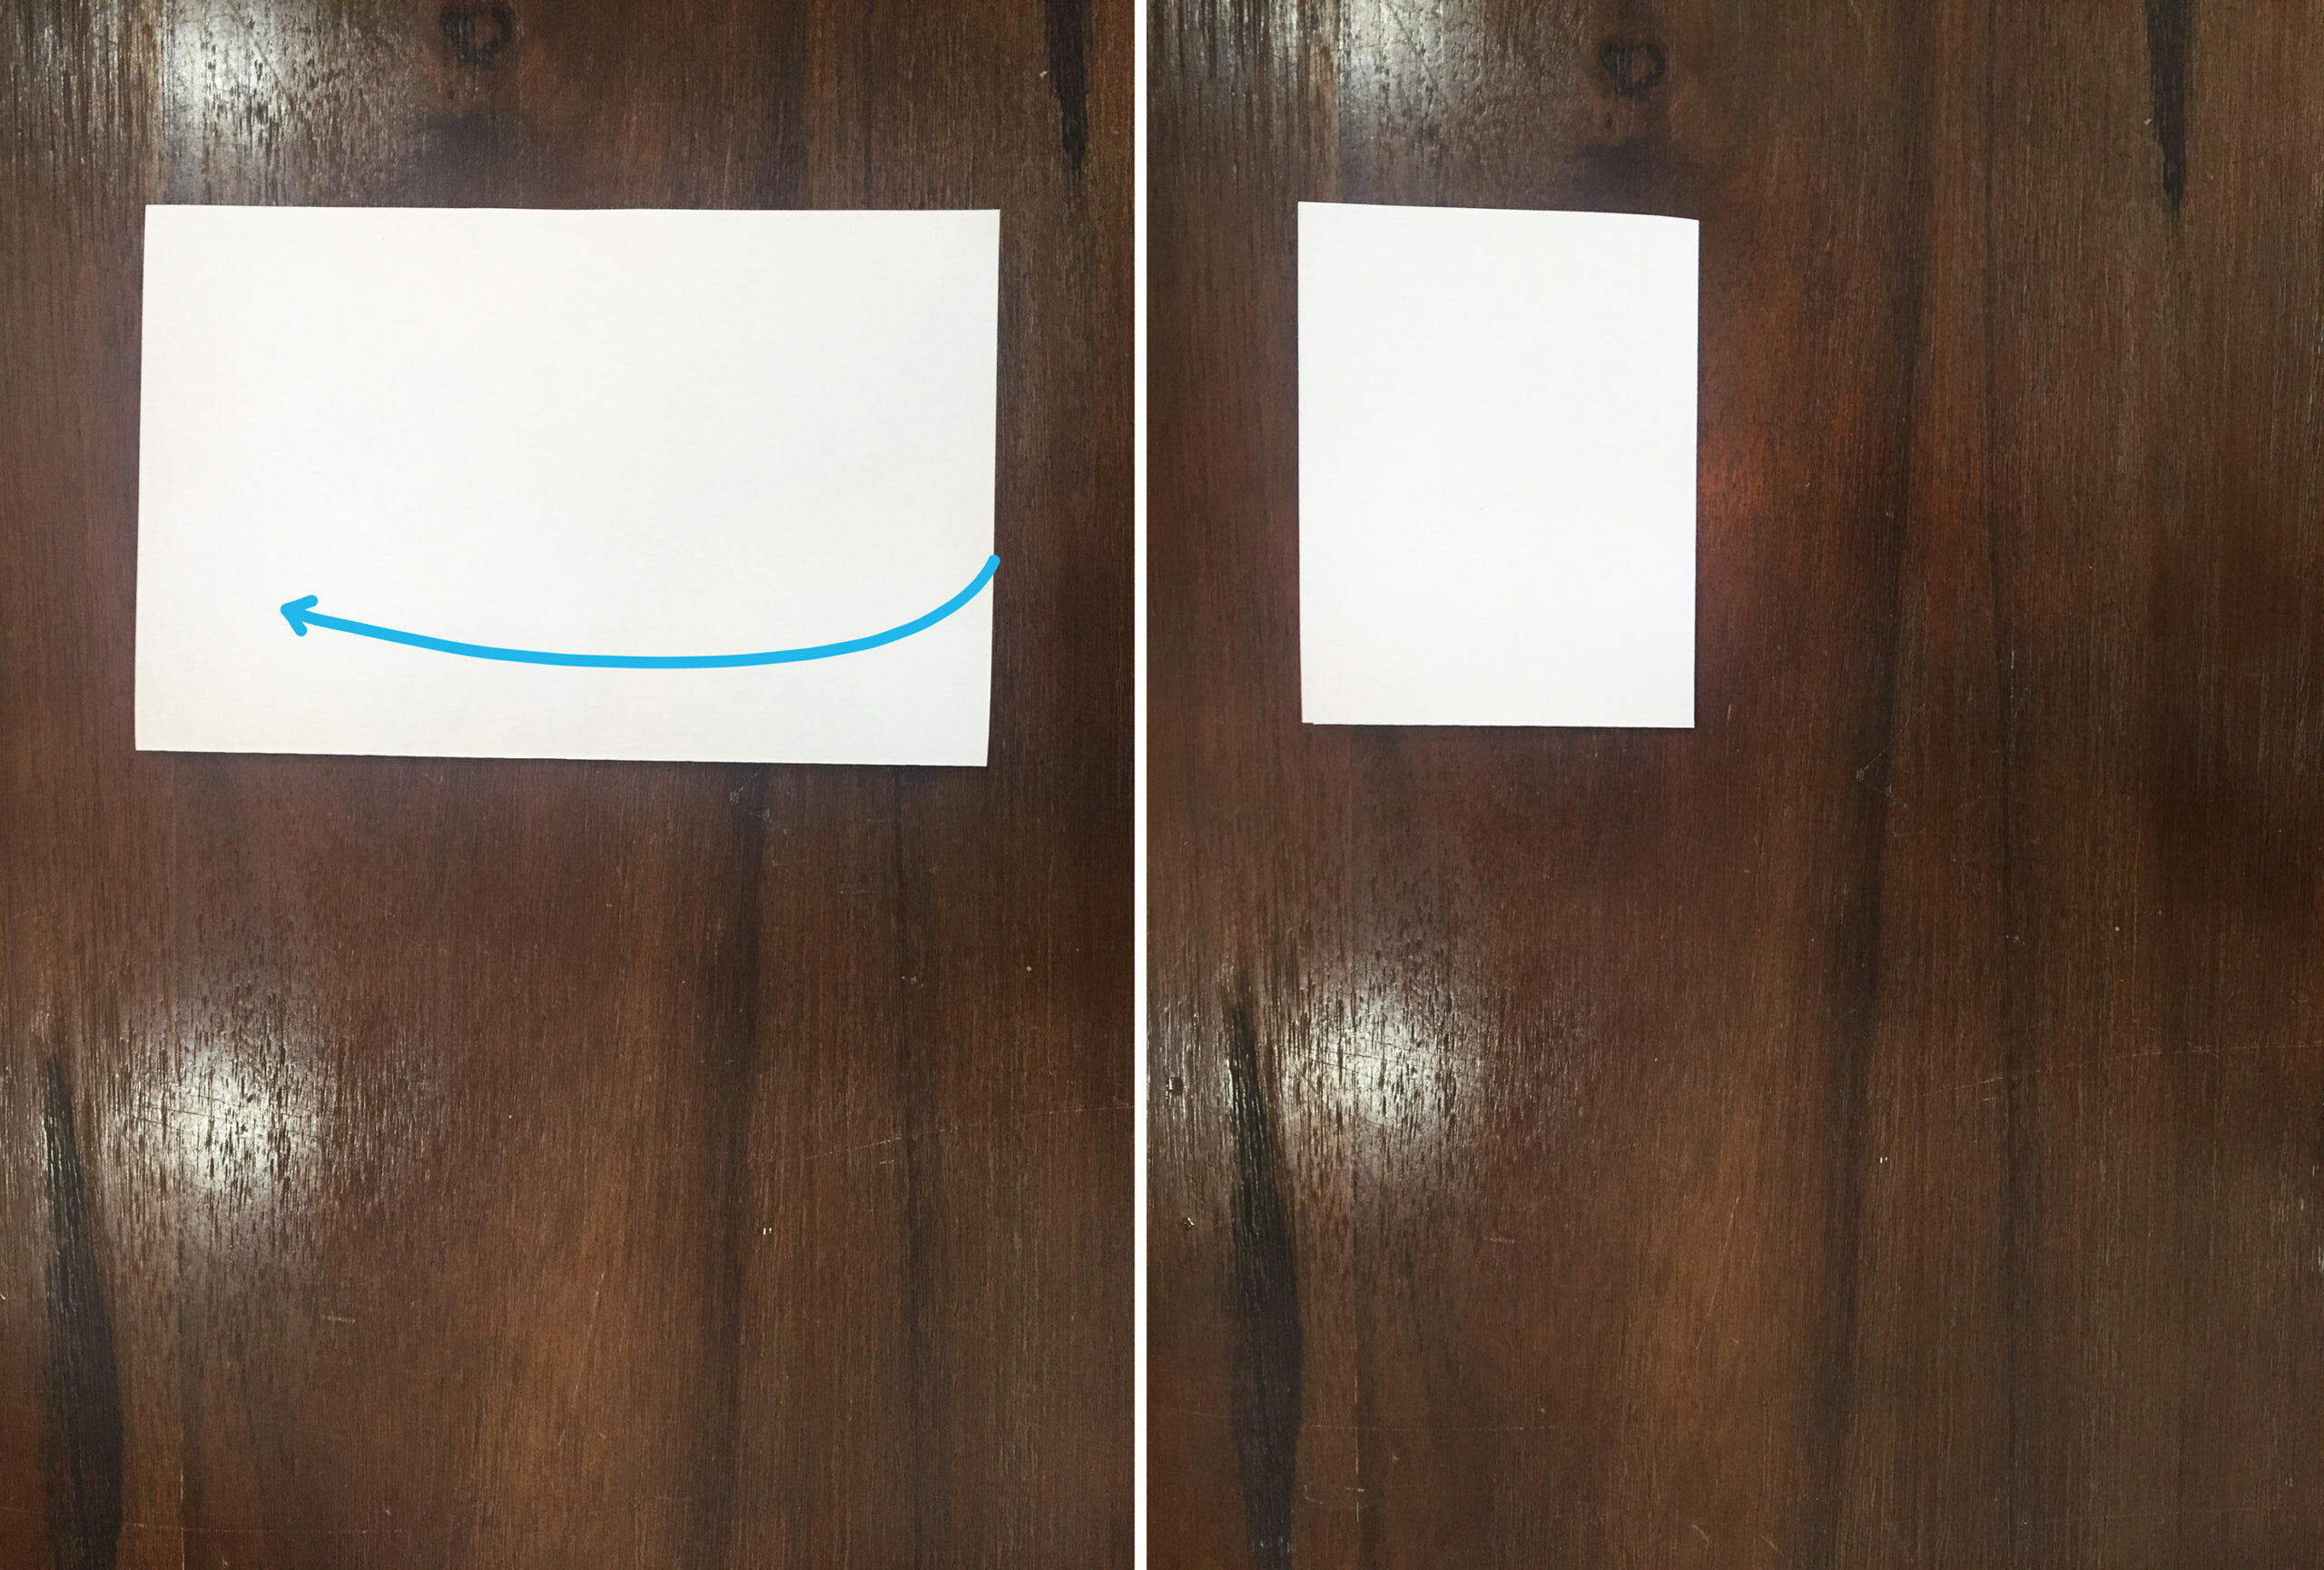
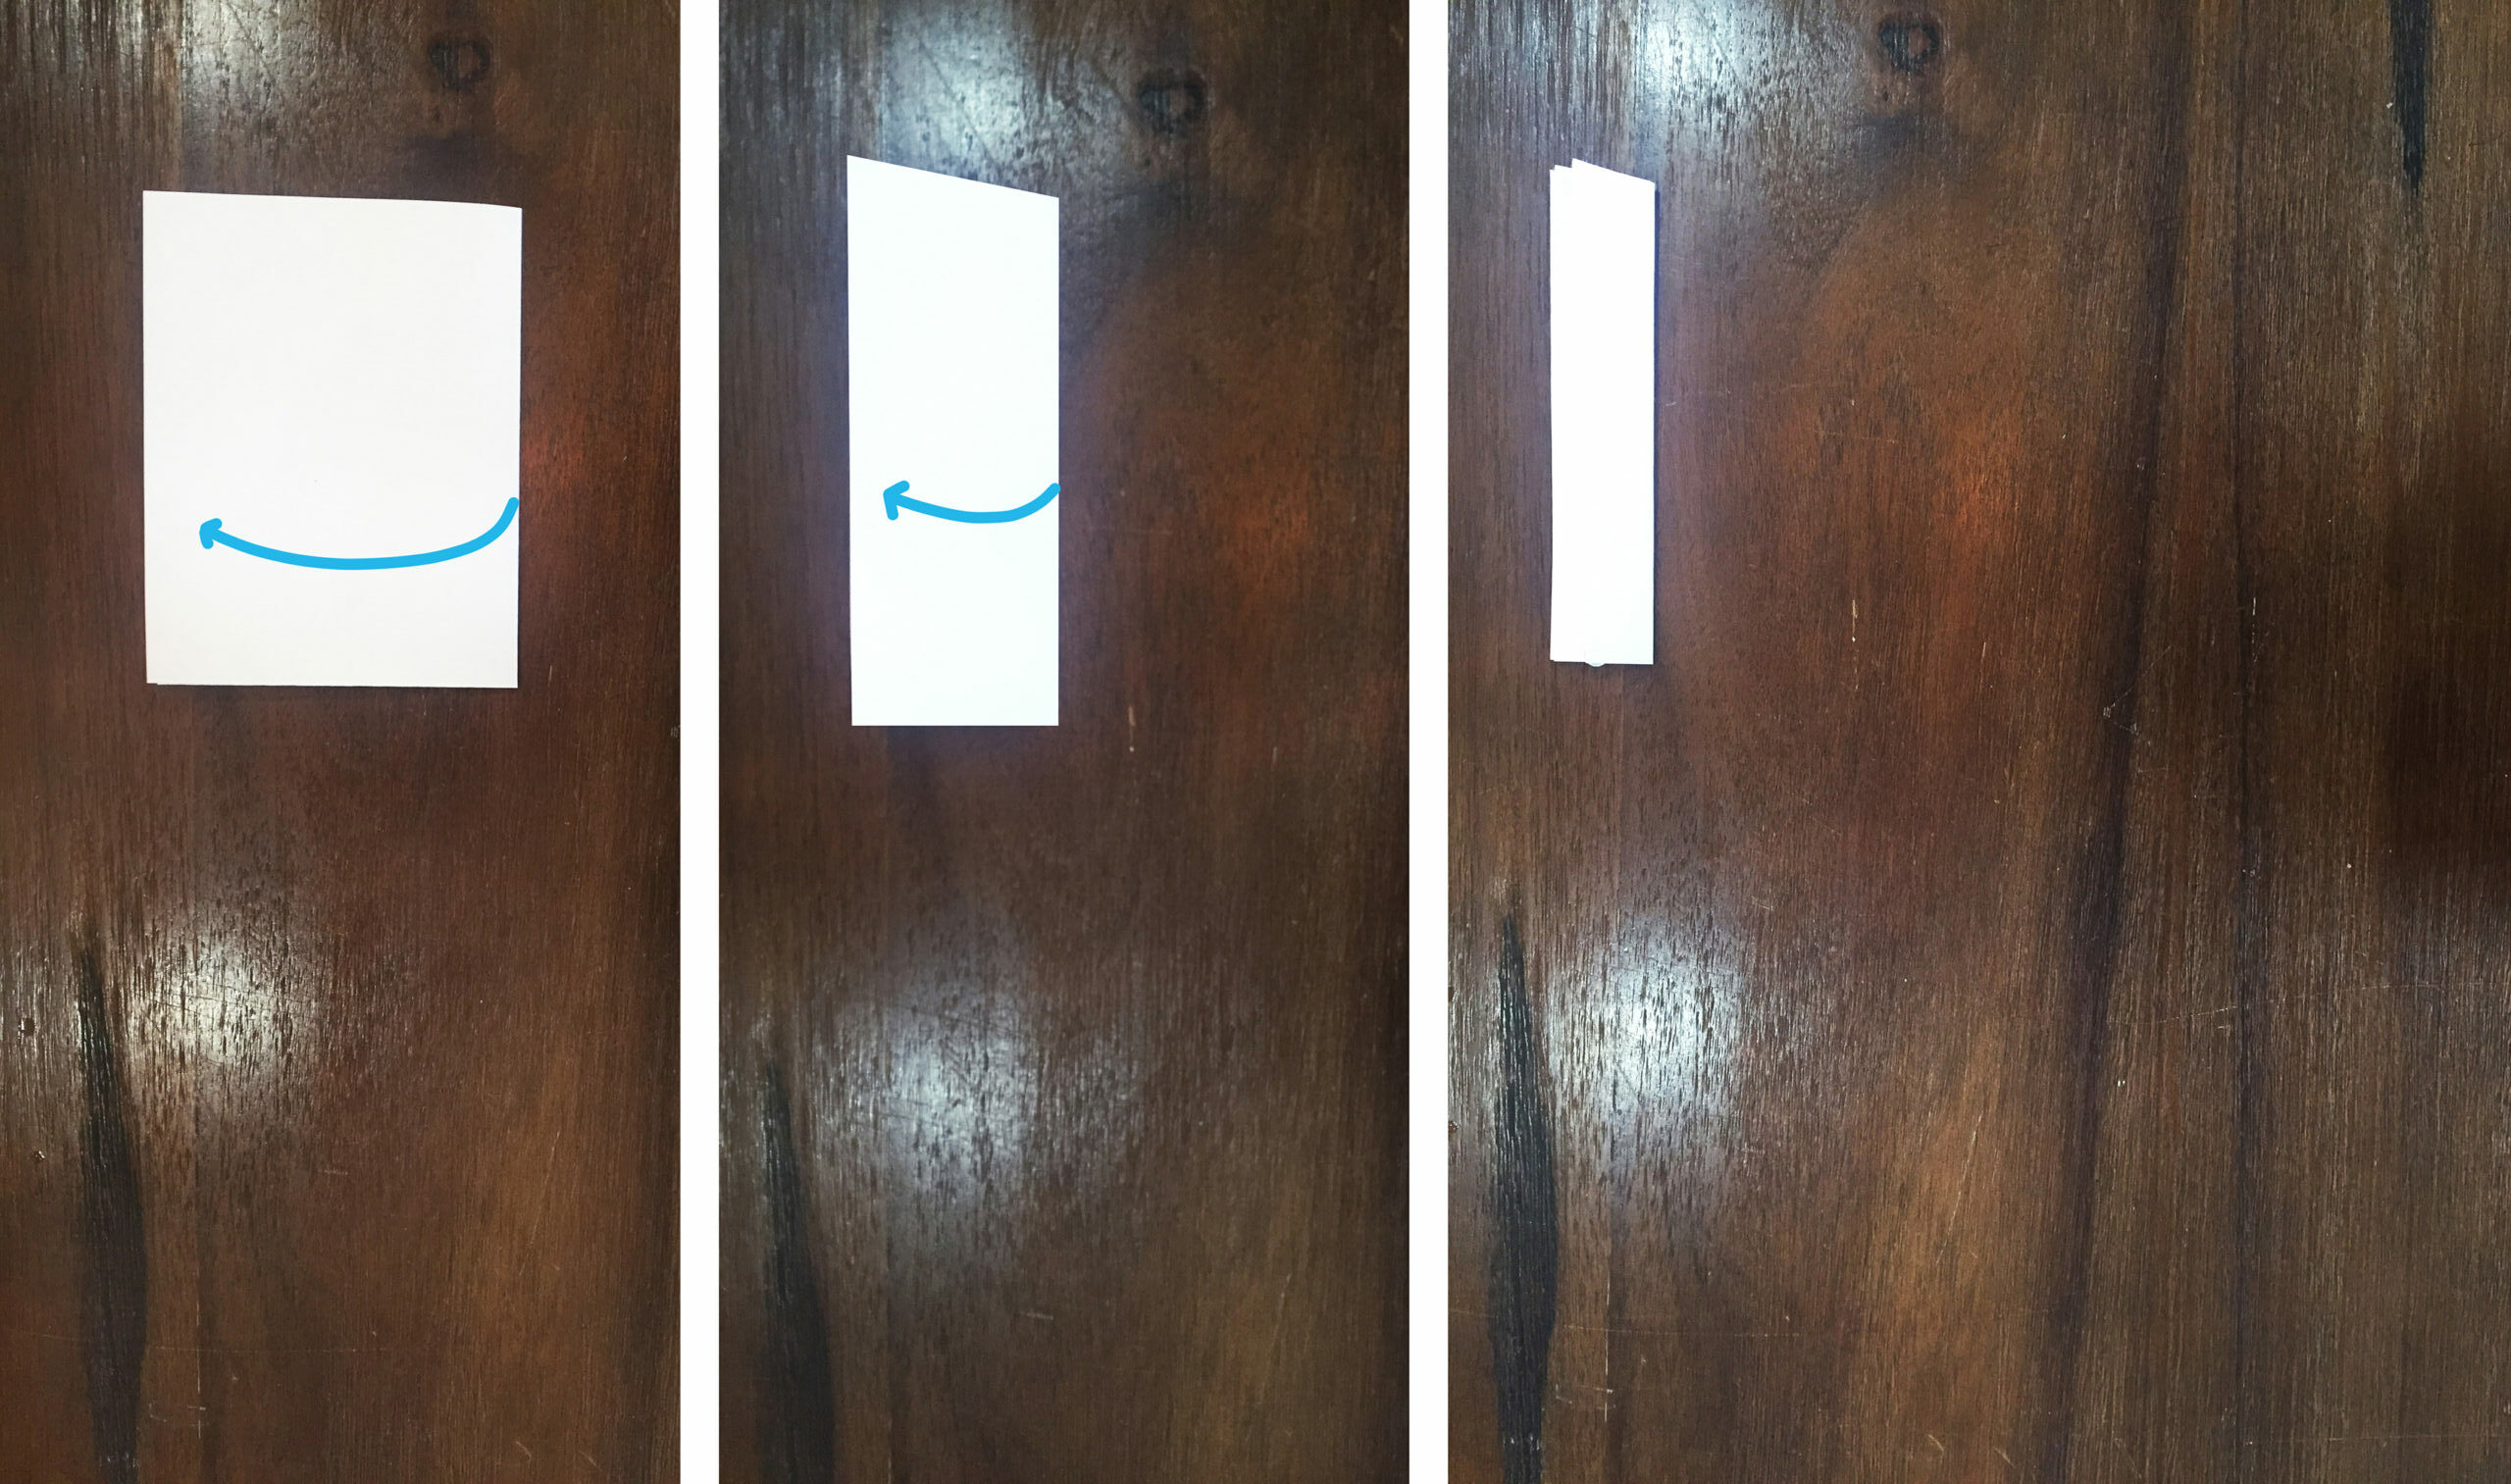
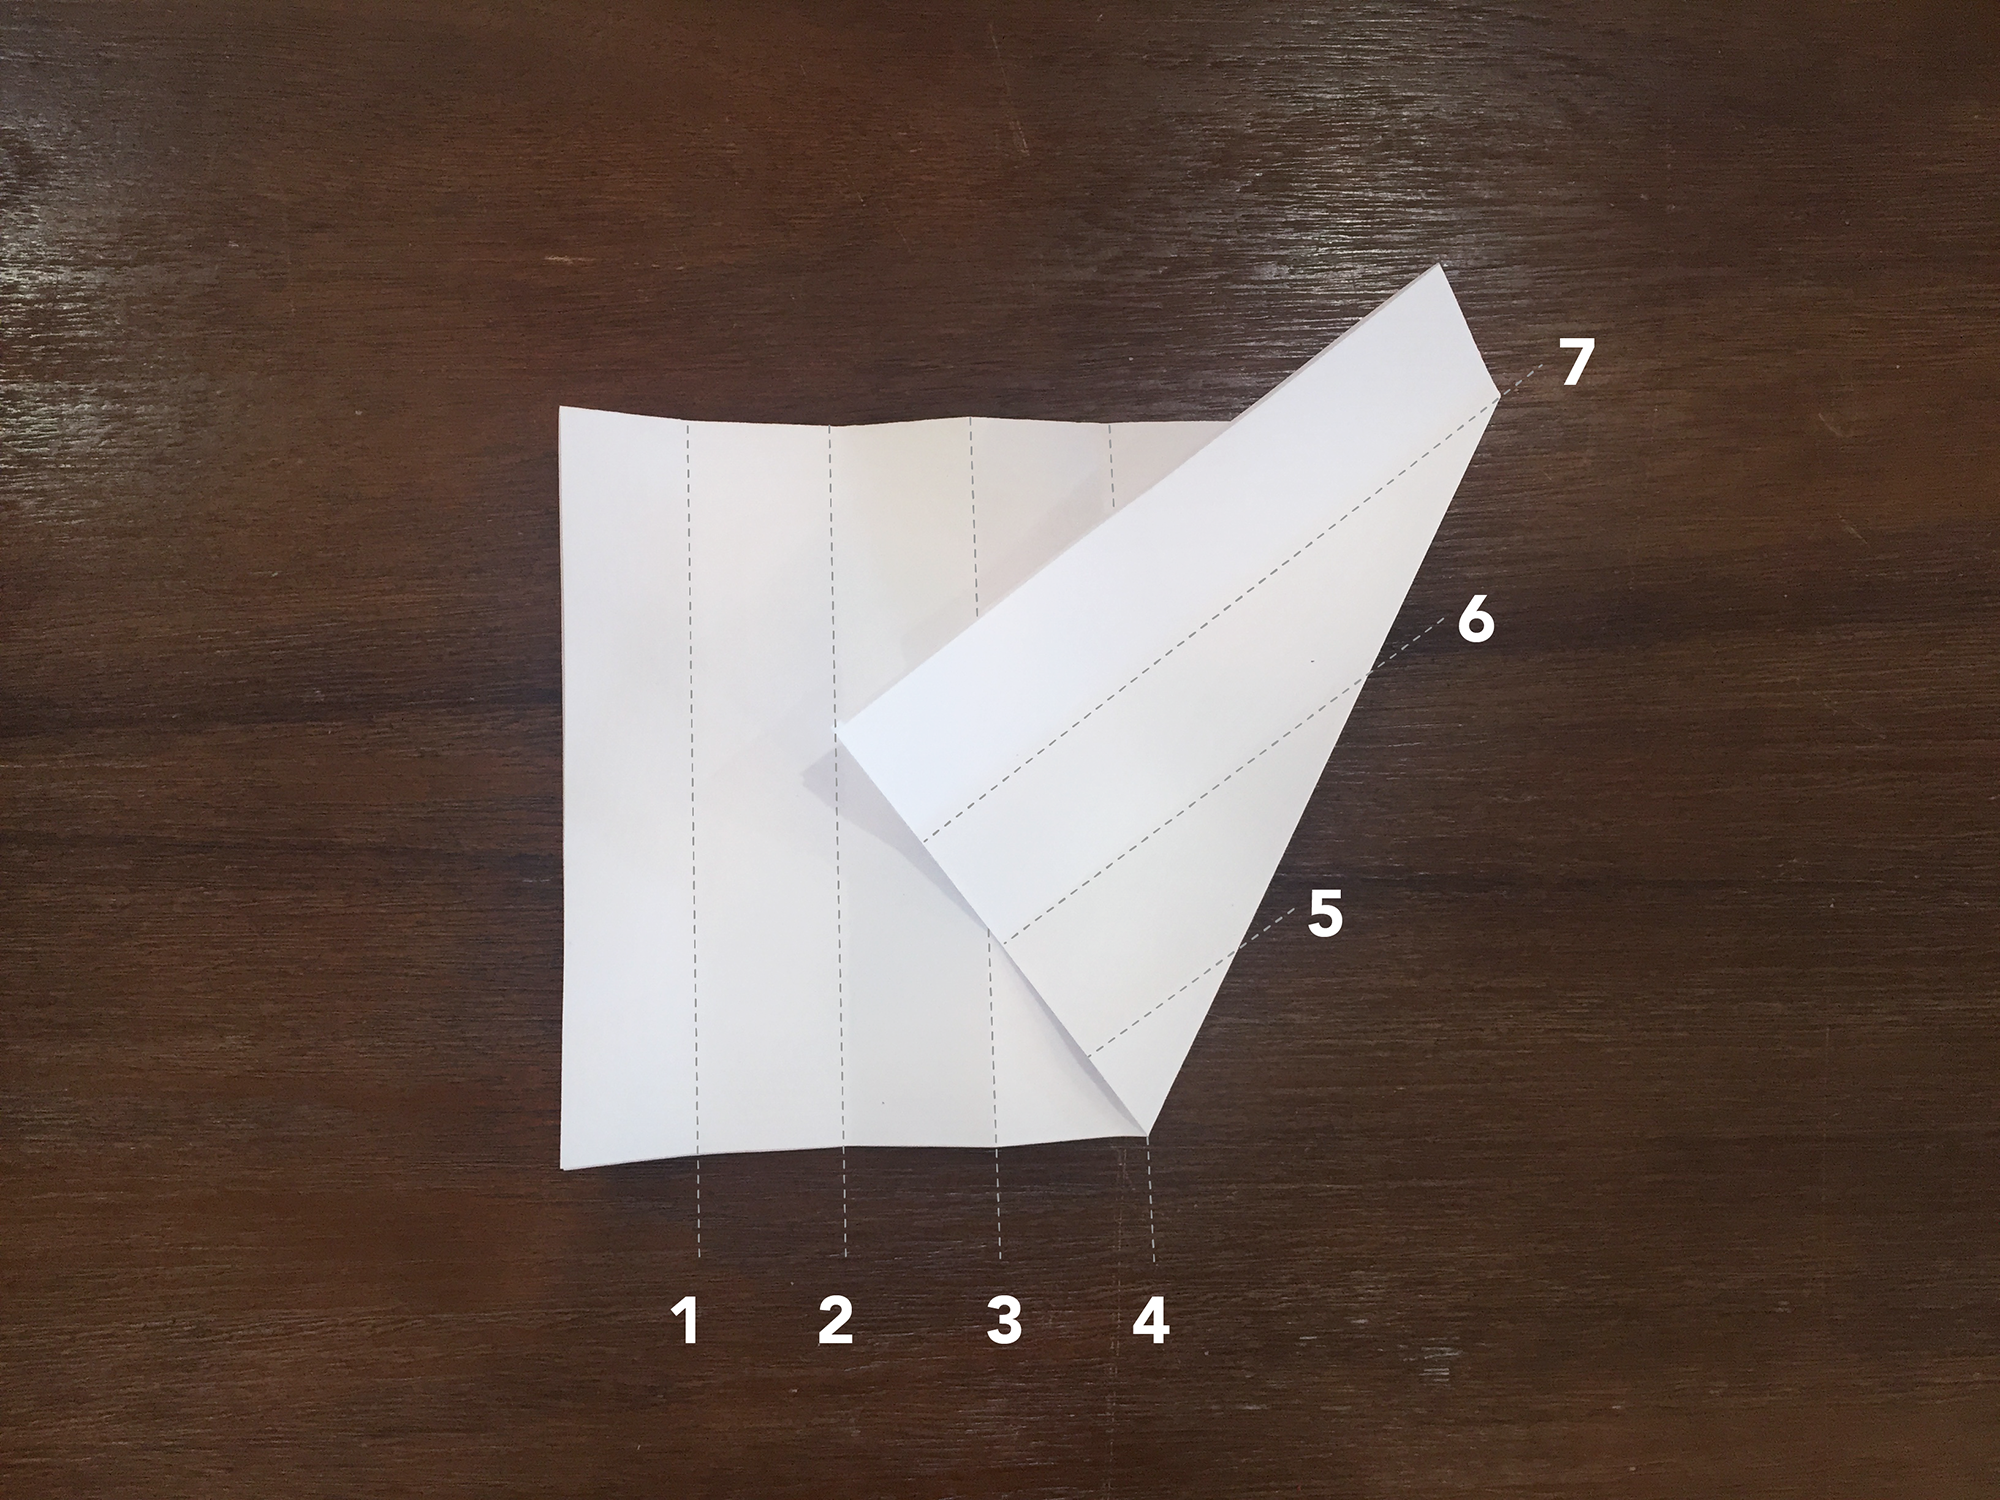
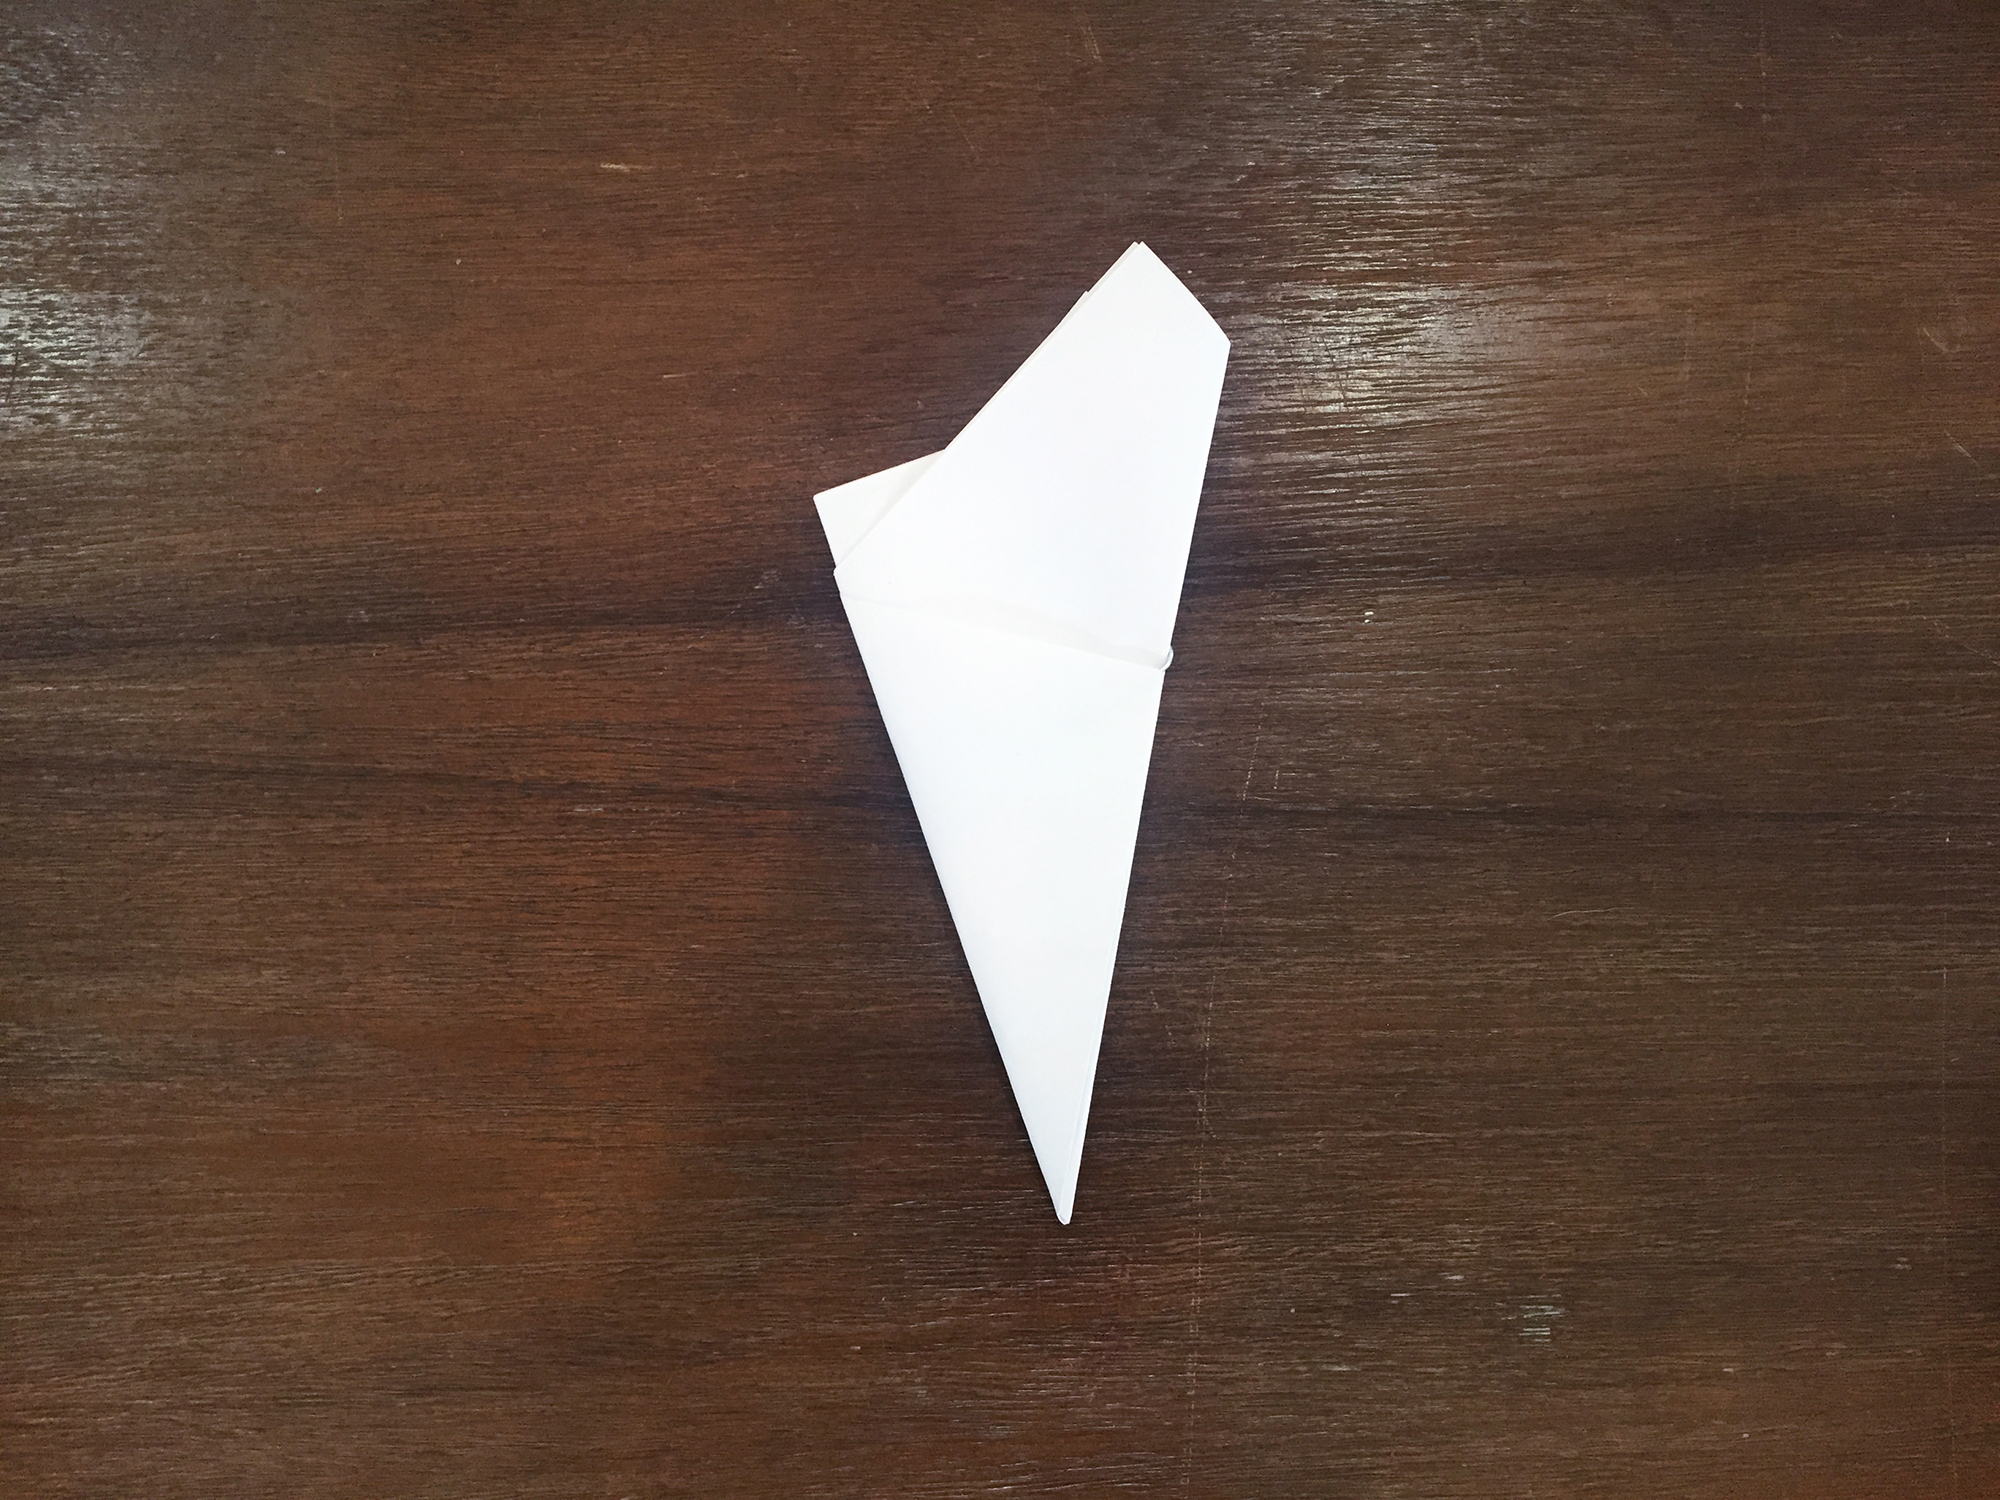
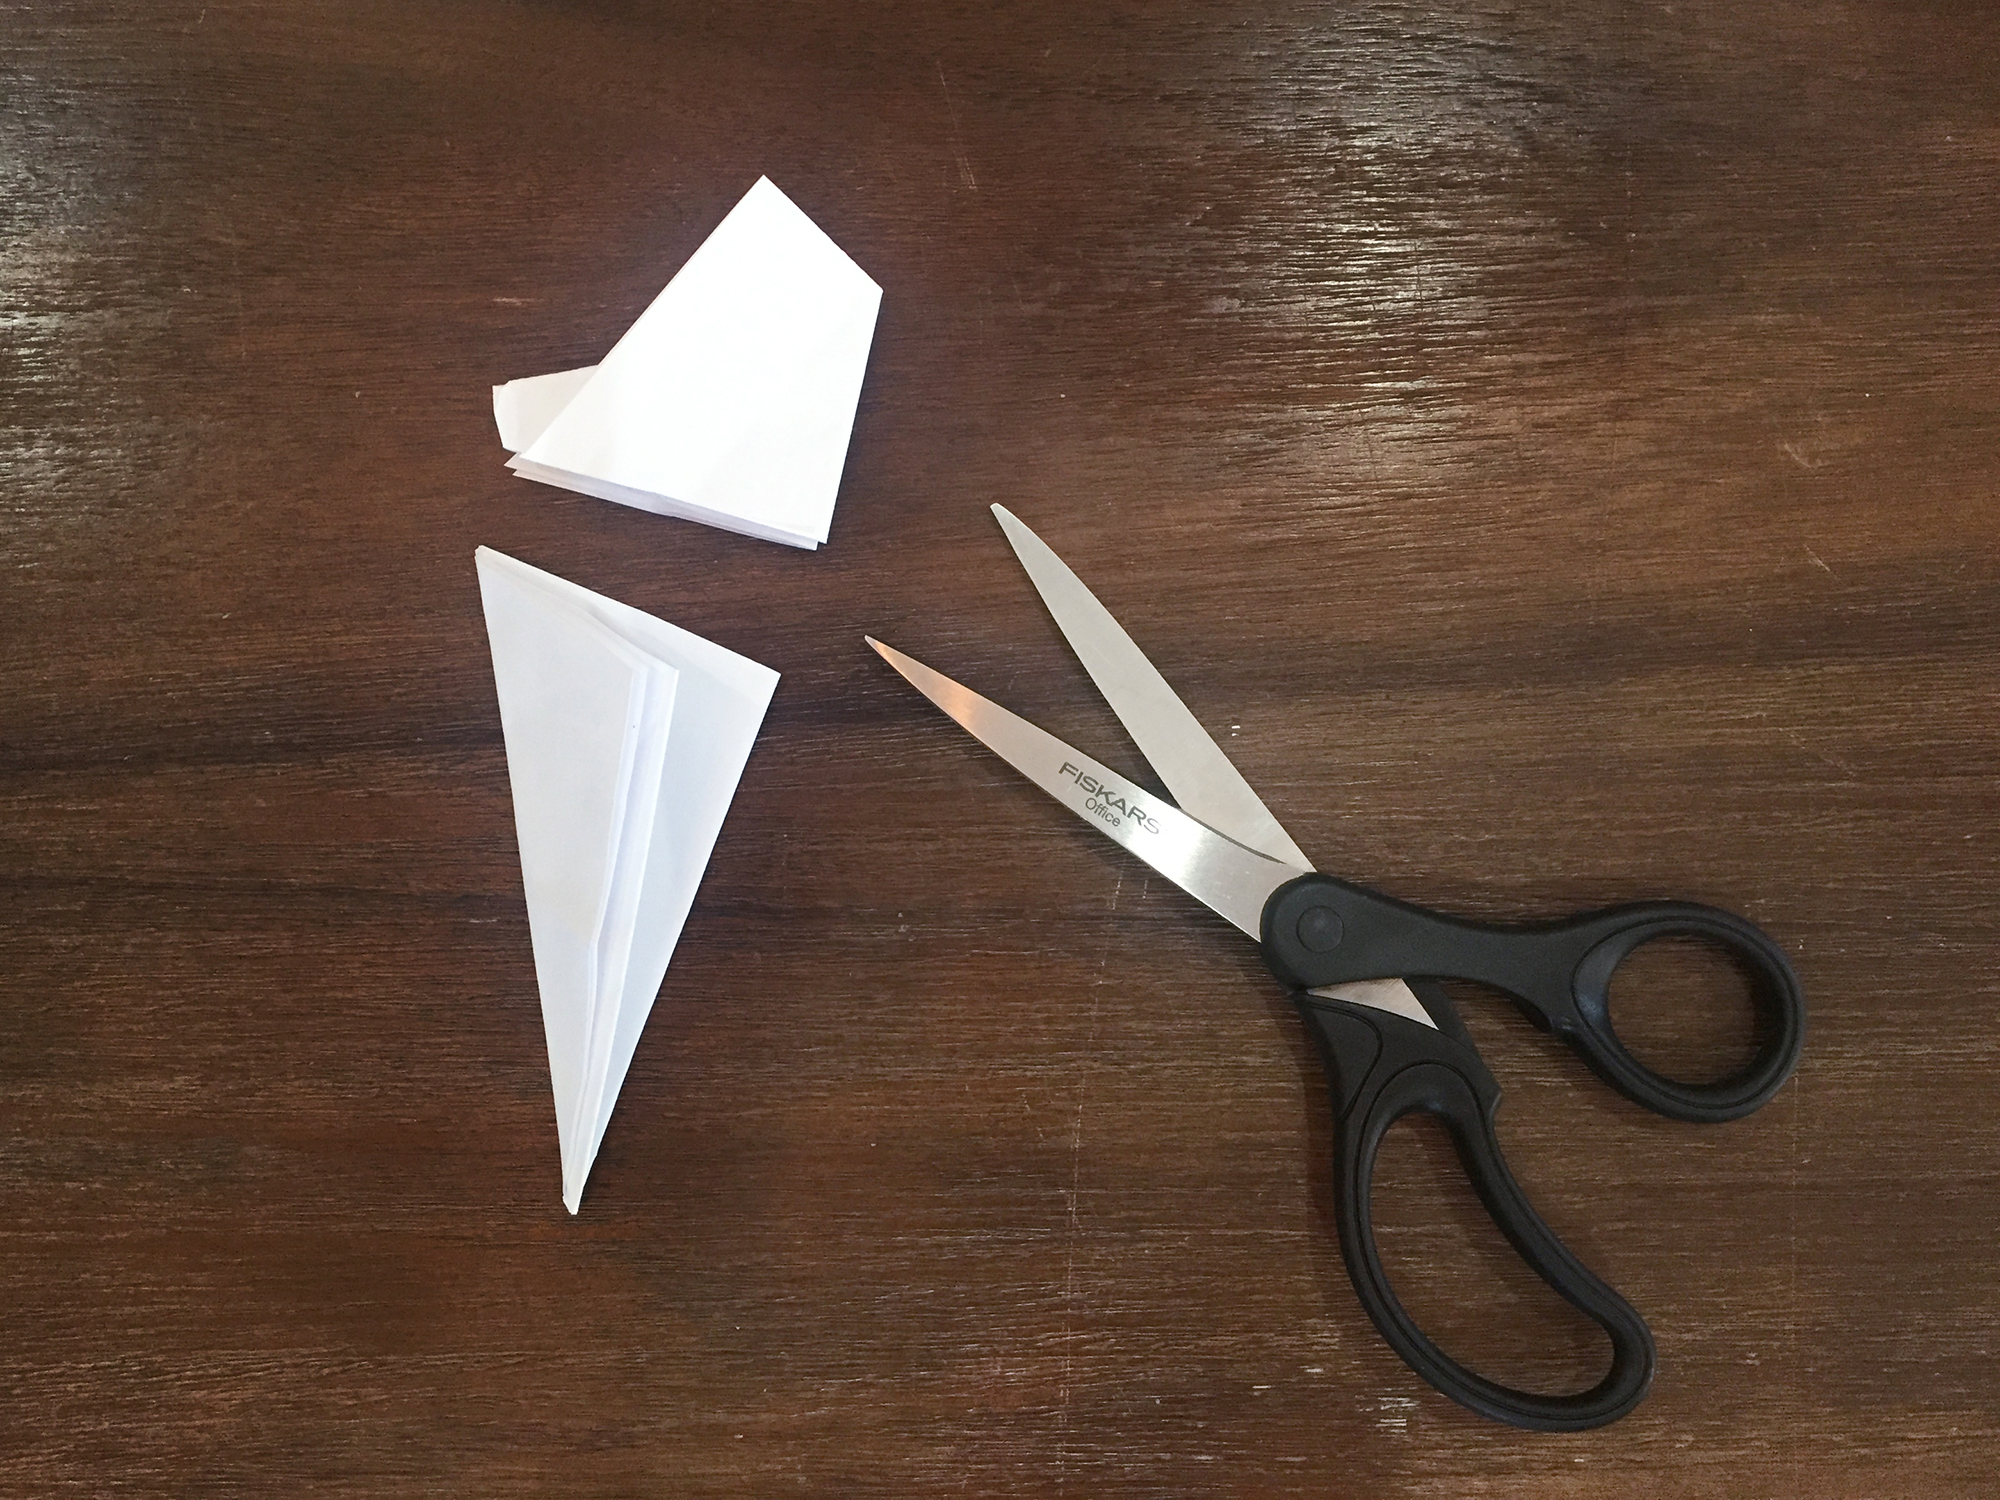
  2. Or continue going through the steps to learn how to make a snowflake using a blank piece of paper.

Fun Fact:

Many artists like to draw 8-sided snowflakes, but these could never really exist. Instead, snowflakes have 6 sides, because of the properties of water molecules (H2O). Frozen water naturally forms a hexagonal (6-sided) shape, which is why snowflakes have 6 sides!
https://discoverycubeconnect.org/wp-content/uploads/2020/11/Gingerbread_PaperSnowflake_Step-1.jpg
2

Start by laying your paper vertically.  Fold the paper in half, bringing the bottom up until it touches the top (sometimes called a hamburger fold).

https://discoverycubeconnect.org/wp-content/uploads/2020/11/Gingerbread_PaperSnowflake_Step-2-scaled-e1604428184694.jpg
3

Bring the right side over until it touches the left, folding the paper in half the other direction.

https://discoverycubeconnect.org/wp-content/uploads/2020/11/Gingerbread_PaperSnowflake_Step-3-scaled-e1604428285313.jpg
4

You want to create a thin rectangle, with 8 sections.  To do this, fold the paper in half two more times, bringing the right edge over until it touches the left edge both times.

Tips & Tricks:

After each fold, it gets harder and hard to fold the paper. Don’t worry if your folds aren’t perfect – these lines will just be used as guides for you in the next couple steps.
https://discoverycubeconnect.org/wp-content/uploads/2020/11/Gingerbread_PaperSnowflake_Step-4-scaled-e1604428351917.jpg
5

Unfold your paper from steps 3 and 4 so you only have your original hamburger fold left.  Make sure the folded edge is closest to you.  The 7 fold lines will run vertically (up and down).  We’ve labeled the lines here to help you see them better.

https://discoverycubeconnect.org/wp-content/uploads/2020/11/Gingerbread_PaperSnowflake_Step-6.png
6

Fold the bottom right corner up so the bottom fold starts at line 4 and the corner matches up with line 2.

https://discoverycubeconnect.org/wp-content/uploads/2020/11/Gingerbread_PaperSnowflake_Step-7.png
7

Take the bottom left corner and fold it up and to the right until it lines up with the right edge created in step 7.

https://discoverycubeconnect.org/wp-content/uploads/2020/11/Gingerbread_PaperSnowflake_Step-8.jpg
8

Flip over and fold the paper in half so you can see your last fold.

https://discoverycubeconnect.org/wp-content/uploads/2020/11/Gingerbread_PaperSnowflake_Step-9.jpg
9

Cut off the top, as shown, to create a simple triangle.

Tips & Tricks:

It can be hard to cut through this much paper! If you start with thinner paper, it will be easier to cut. Or ask an adult for help.
https://discoverycubeconnect.org/wp-content/uploads/2020/11/Gingerbread_PaperSnowflake_Step-10.jpg
10

Keeping your paper folded, cut out various shapes, but be careful not to cut off the bottom tip!  Try making large cuts, as this will make for a more dramatic looking snowflake.

Tips & Tricks:

If it is too hard for you to cut all the way through the paper, try drawing out your shapes and asking an adult to help you cut along the lines.
https://discoverycubeconnect.org/wp-content/uploads/2020/11/Gingerbread_PaperSnowflake_Step-11.jpg
11

When you are happy with the way you have cut your triangle, unfold to reveal a beautiful 6-sided snowflake!

Tips & Tricks:

Homemade snowflakes make for great holiday decorations and can even be turned into ornaments!
https://discoverycubeconnect.org/wp-content/uploads/2020/11/Gingerbread_PaperSnowflake_Step-12.jpg